Master Jenkins Migration : Preserve Jobs, Configurations, and Plugins
12/6/2024 • VirtueCloud
Introduction
Jenkins is a cornerstone of many CI/CD pipelines, enabling seamless automation for software development and deployment. But as infrastructure evolves, migrating Jenkins from one virtual machine (VM) to another becomes inevitable—for scalability, resource optimization, or upgrading environments.
This guide provides a step-by-step process for migrating Jenkins while preserving all jobs, configurations, and plugins. The approach ensures minimal downtime, full data integrity, and no service conflicts. Whether you're scaling your Jenkins setup or transitioning to a new environment, this migration guide has you covered.
Overview
This document details how to migrate a Jenkins server between VMs while ensuring:
- Data integrity: Preserving all jobs, configurations, and plugins.
- Consistency: Maintaining the same Java and Jenkins versions.
- Minimal service disruption: Using port forwarding to enable seamless access to the new instance.
Objectives
- Migrate Jenkins with no loss of data or functionality.
- Maintain compatibility by replicating the original environment.
- Ensure users experience minimal disruption during the transition.
Prerequisites
- Access to both the old and new VM environments.
- A Jenkins instance running on the old VM with data that needs to be migrated.
- Azure Storage account (or equivalent storage) to temporarily store the Jenkins home directory.
- Permissions to copy files between VMs and restart Jenkins.
Steps for Migration
Set Up the New VM
Objective: Replicate the environment on the new VM to avoid compatibility issues.
- Install the same Java version as on the old VM:
sudo apt install openjdk-17-jdk -y - Install Jenkins on the new VM, ensuring it matches the old instance’s version:
sudo wget -O /usr/share/keyrings/jenkins-keyring.asc \
  https://pkg.jenkins.io/debian-stable/jenkins.io-2023.key
echo "deb [signed-by=/usr/share/keyrings/jenkins-keyring.asc]" \
  https://pkg.jenkins.io/debian-stable binary/ | sudo tee \
  /etc/apt/sources.list.d/jenkins.list > /dev/null
sudo apt-get update
sudo apt-get install jenkins - Stop both Jenkins instances to avoid conflicts during the migration:
sudo systemctl stop jenkins # On both VMs Backup Jenkins Data to Azure Storage
Objective: Safely transfer the Jenkins data from the old VM to the new one via Azure Storage.
- Archive the JENKINS_HOME directory on the old VM. This directory contains all the necessary data, including job configurations, plugins, and system settings.
tar -czvf jenkins_backup.tar.gz /var/lib/jenkins - Upload the archived backup file to an Azure Storage:
az storage blob upload \
--account-name <your_storage_account> \
--container-name <container> \
--file jenkins_backup.tar.gz \
--name jenkins_backup.tar.gz
Download Jenkins Data from Azure to the New VM
Objective: Restore the Jenkins data from Azure Storage to the new VM.
- Download the archived Jenkins home directory data from Azure to the new VM:
az storage blob download \
--account-name <your_storage_account> \
--container-name <container> \
--name jenkins_backup.tar.gz \
--file jenkins_backup.tar.gz \
--account-key <key>
Extract Data on the New Jenkins Instance
Objective: Deploy the Jenkins data to the correct directory on the new VM.
- Extract the archived data into the Jenkins home directory (/var/lib/jenkins) on the new VM.
sudo tar -xzvf jenkins_backup.tar.gz -C /var/lib/jenkins- Set proper permissions for the Jenkins user:
sudo chown -R jenkins:jenkins /var/lib/jenkins Start Jenkins on the New VM
Objective: Verify that the migration is successful.
- Start the Jenkins service on the new VM.
sudo systemctl start jenkins - Use SSH port forwarding to access the new Jenkins instance on localhost:8080.
ssh -i <path_to_your_key.pem> -L 8080:localhost:8080 <user>@<new_vm_ip_address>Verification:
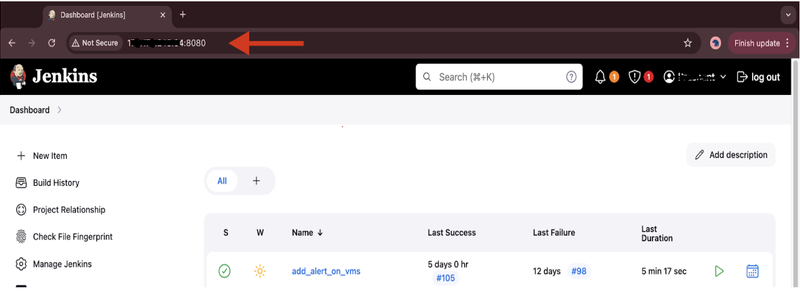
- Access Jenkins via your browser at localhost:8080 or the Public IP address of the new VM.
- Verify that all jobs, configurations, and plugins are restored.
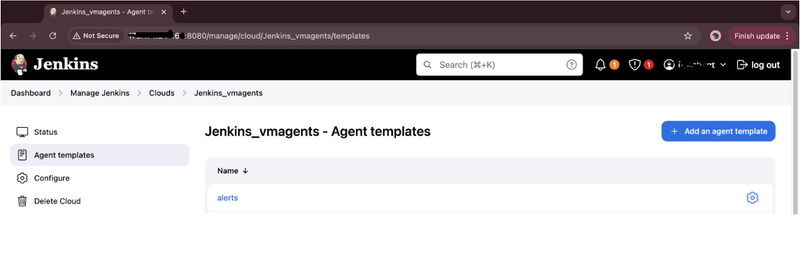
- Verify that your old agent templates are present at their configured locations.
Conclusion
By following these steps, you’ve successfully migrated Jenkins to a new VM with no data loss or service conflicts. Using Azure Storage for backup ensures data consistency and simplifies the migration process. This guide minimizes downtime, allowing your team to continue delivering with confidence.
Have you performed a Jenkins migration before? Share your experiences or tips in the comments below. If you found this guide helpful, feel free to share it with your network!
Also Read
Related articles you might find interesting
Ingress Got You This Far — A Field Guide to Gateway API & HTTPRoute
Why platform teams are re-routing north-south traffic through the Kubernetes Gateway API, what HTTPRoute changes on the ground, and how to migrate without a big-bang rewrite.

AWS Graviton: High-Performance Compute with Energy Efficiency and Cost Savings
Automated ECS Deployment: Fargate or EC2, Make it easy with VirtueCloud
Hassle-Free ECS: Terraform Automation + CI/CD Pipeline